
Creating a Sale
-
Click the New Sale button to initiate a new sale transaction.
-
A dialogue box will open, presenting the following fields:
-
Select Customer: Choose the customer from the dropdown list. You can also create a new customer by selecting the option presented at the top.
-
Select Product: Choose the product from the dropdown list. You can select from the available products. Optionally, you can use the “Scan Product” option to scan the product barcode using your device’s camera.
-
Order Date: Select the date of the sale.
-
Due Date: Choose the due date for payment. This field is disabled if the payment type is set to “Paid.” You can provide tips for selecting the due date based on payment type.
-
Payment Type: Select the payment type from “Paid,” “Due,” or “Credit.”
-
Scan Product: Use this option to scan the product barcode using your device’s camera. Grant permission when prompted, and the product will be automatically selected.
-
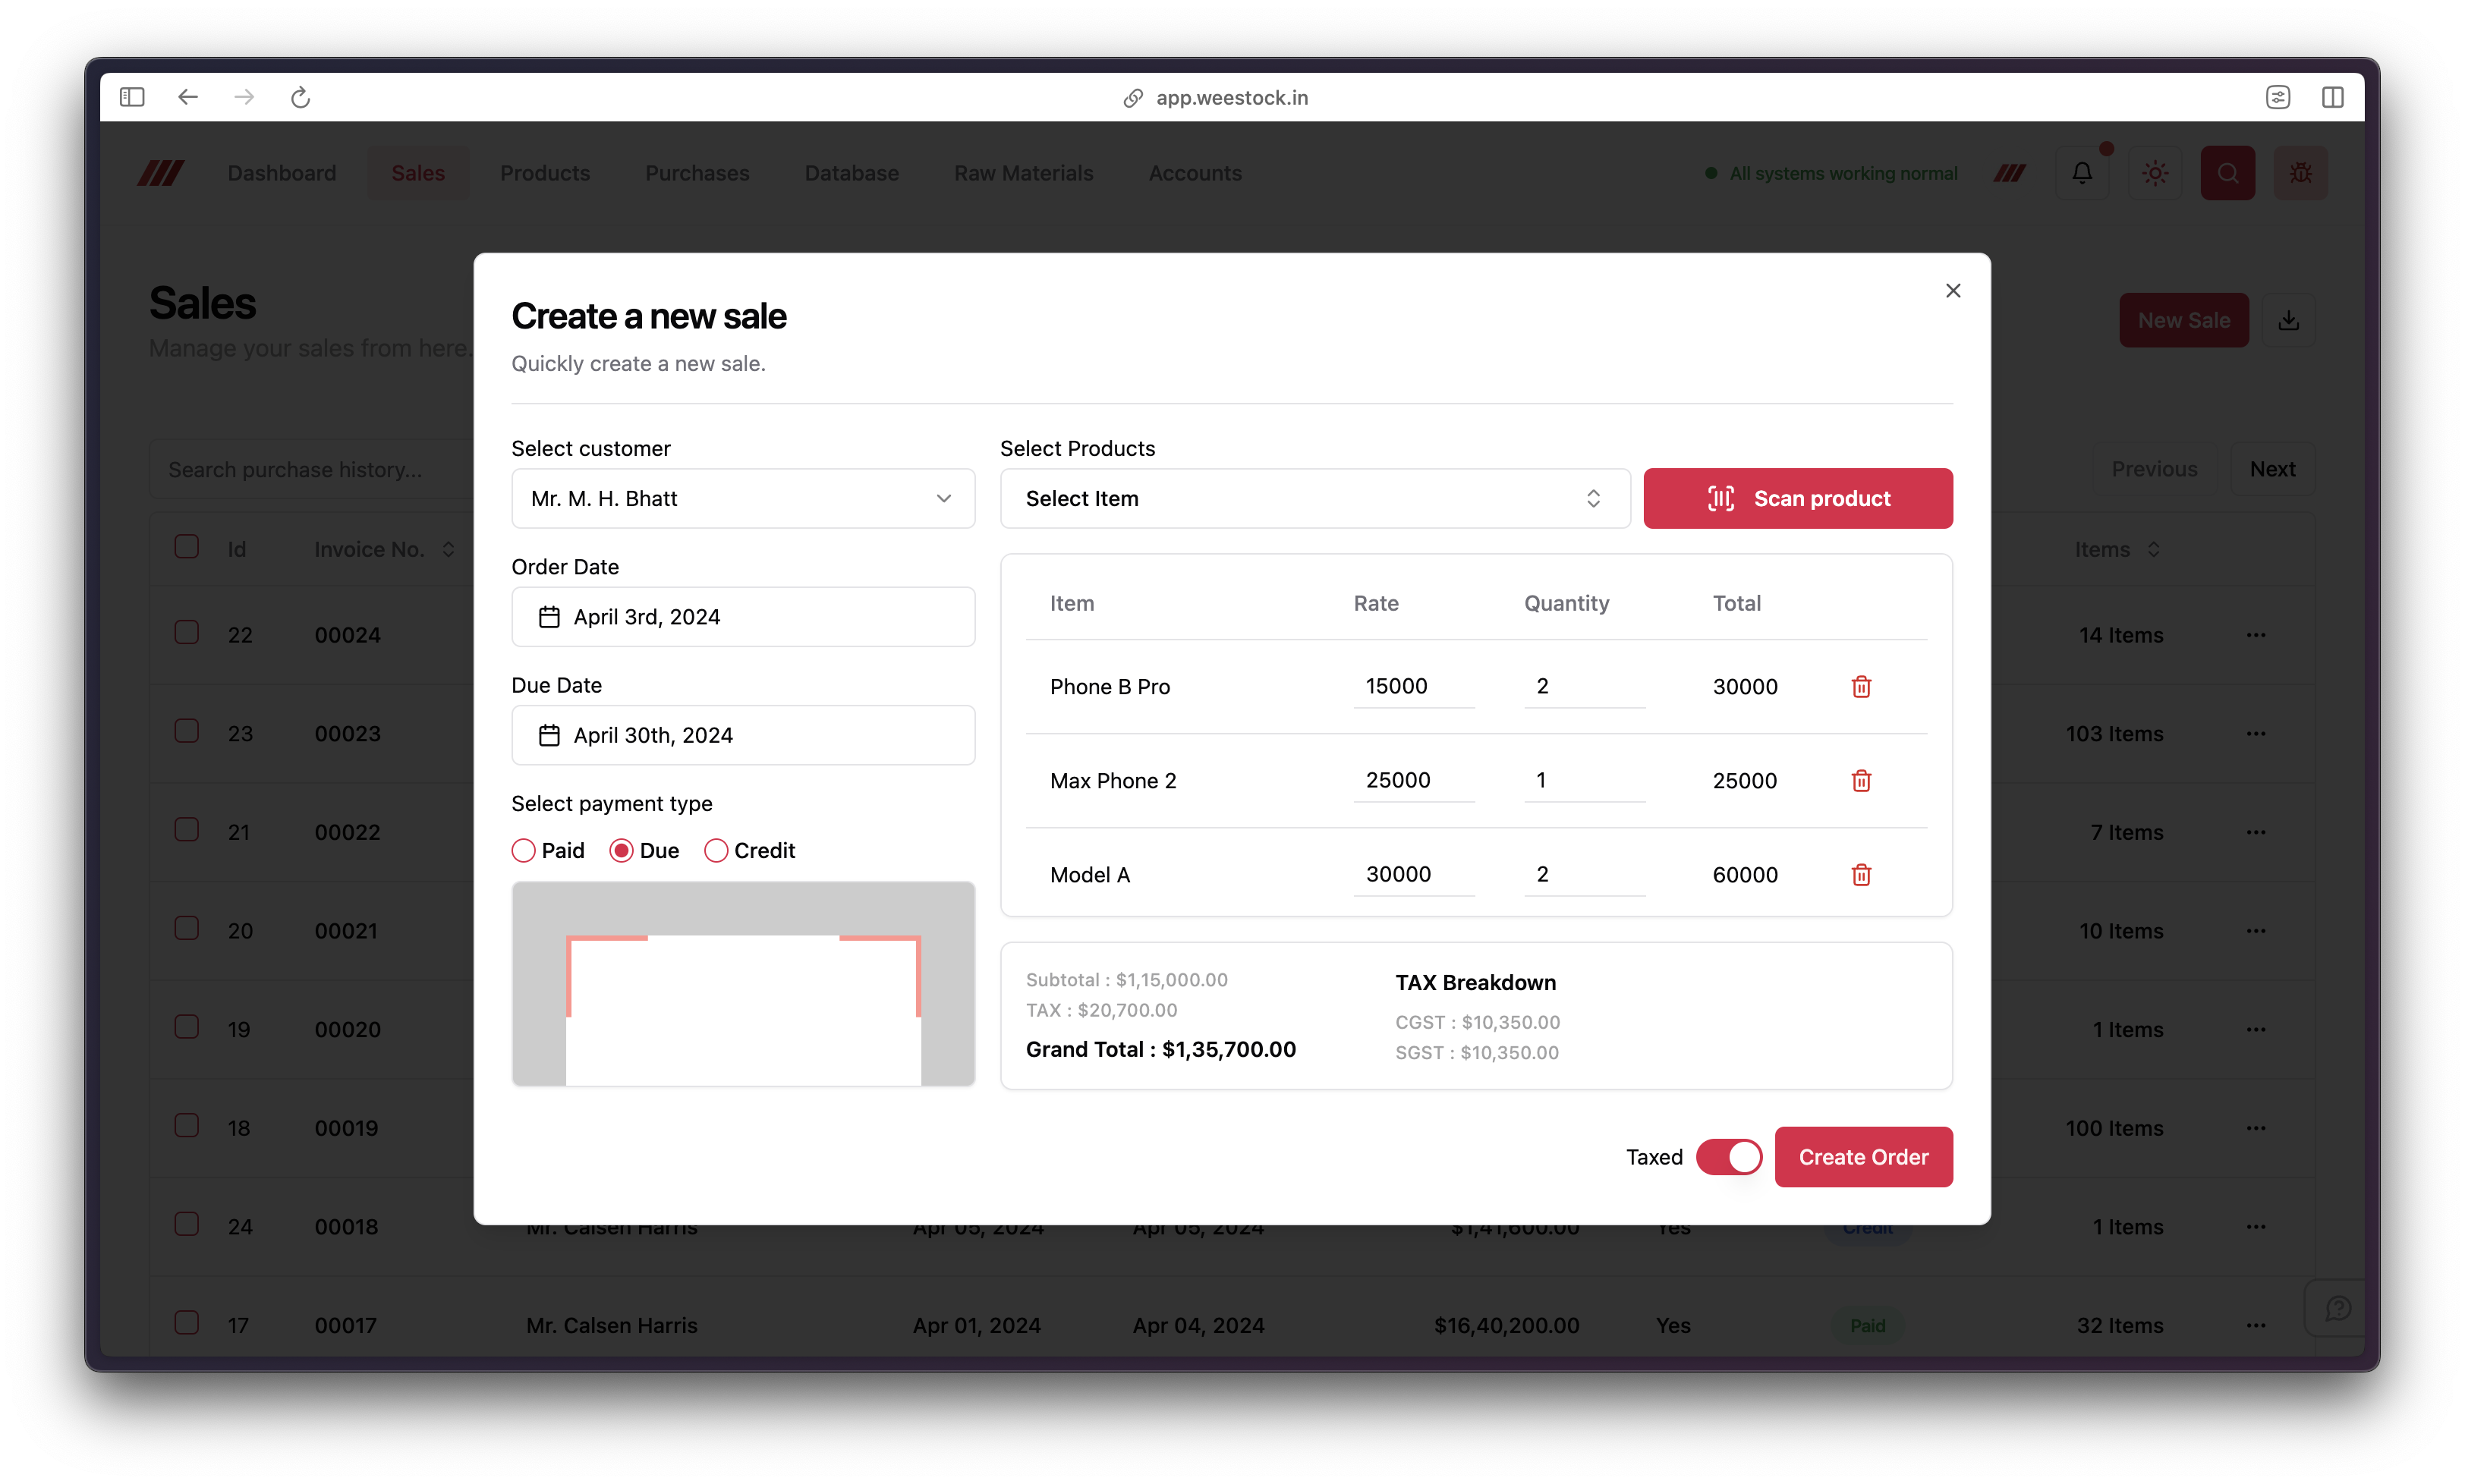 3. Once the product is selected, it will be displayed in a table along with its price. You can adjust the price if needed and specify the quantity in the quantity box.
-
Toggle the Tax switch to mark the sale as a taxed sale. The grand total with tax and tax breakdown will be displayed accordingly.
-
After confirming all the sale details, click the Create Order button to finalize and create the order.
This process allows you to efficiently create sales transactions, manage customer interactions, and track payments within your inventory management system.